
an open-source hardware product
OrangePi-One + OctoPrint = OrangeOctopus
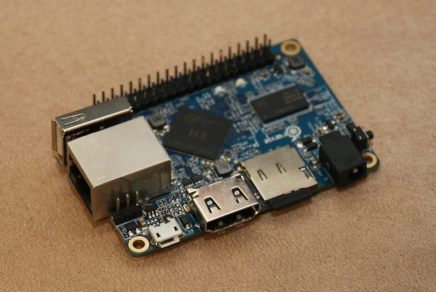
Building an OctoPrint server with an optional webcam on an OrangePi One.
For all those who just need it and don’t want to know how to do it – scroll down to the end. I’ve prepared an image. You can download it there.
Basic hardware setup
- Download the latest Armbian image for OrangePi One to your PC – https://www.armbian.com/orange-pi-one/
- Extract it on your PC.
- Flash it to an 16GB SD-card with Balena Etcher – https://www.balena.io/etcher/
- Put SD-card into OrangePi One
- Connect OrangePi One with your LAN
- Connect OrangePi One to your 5V DC power source
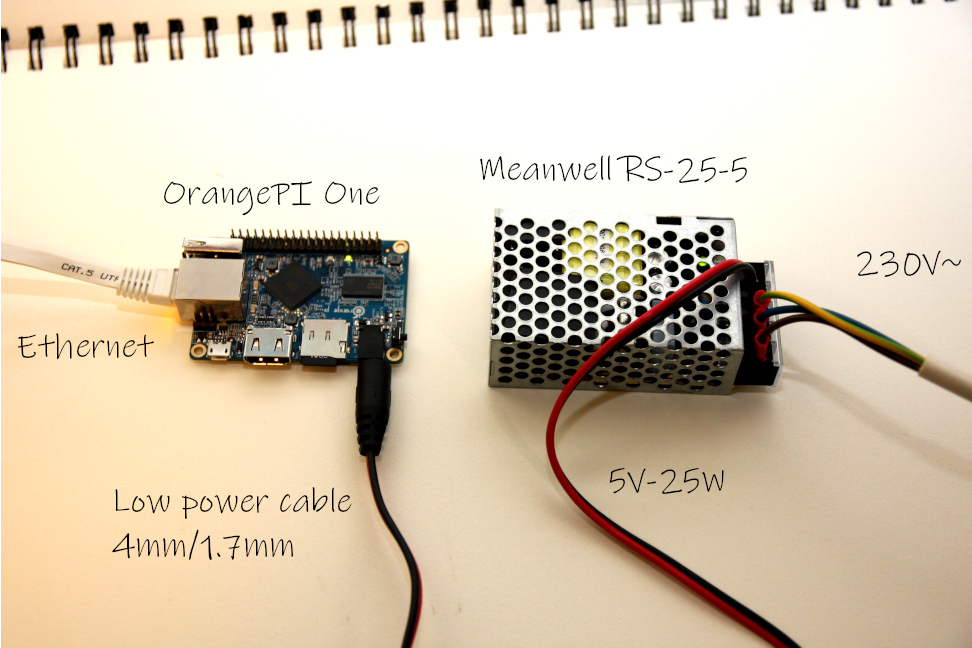
Note
The needed low power plug is a little bit special.
The OrangePi can’t be powered through the USB port like an RaspberryPi!
A low power connector with 4mm outer diameter and 1.7mm inner diameter is needed!
You can order it at Conrad Electronics – Link
Armbian setup
- Download PuTTY – https://www.chiark.greenend.org.uk/~sgtatham/putty/
- Find out the IP address the OrangePi got from your DHCP
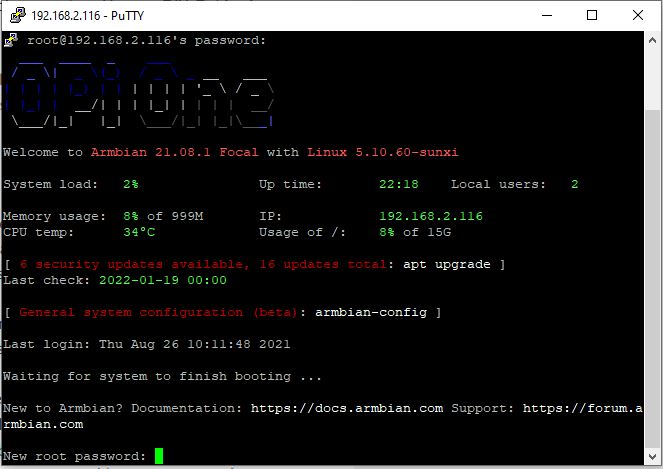
- Openn PuTTY and connect to the Pi’s IP
- Use the „root“ user and the initial password „1234“
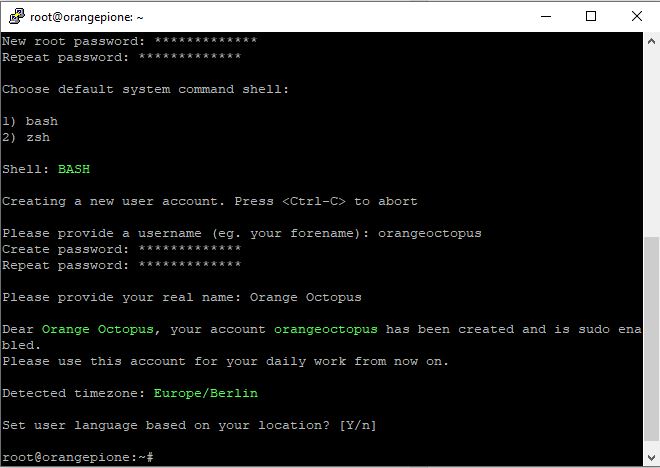
- Immediately change the root password like Armbian asks for
- Choose bash or zsh – I chose bash
- Create a new user account like asked – use „orangeoctopus„
- Set a password as asked
- Choose language settings as asked
- To set a fixed IP address weather IPv4 or IPv6 use the NetworkManager
- Change hostname to orangeoctopus (if you want to)
$ sudo nmtui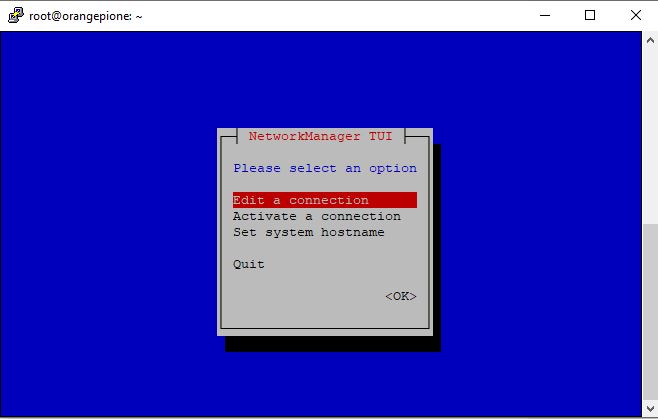
- If IP was changed: reboot (power-on-off) and connect to the new IP address via PuTTY
- Update the software with the following commands
$ sudo apt-get udate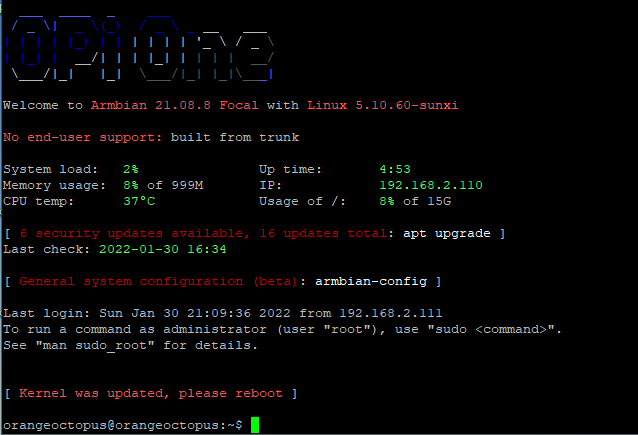
$ sudo apt-get upgrade- If you get error messages you can try the following command to solve them
$ sudo apt-get upgrade --fix-missing- Observe during re-login if the kernel was updated and reboot if OrangePi asks for that. Or reboot anyway.
Install Octoprint
- Add user to groups and install python pip and other
$ sudo usermod -aG tty orangeoctopus
$ sudo usermod -aG video orangeoctopus
$ sudo usermod -aG dialout orangeoctopus
$ sudo apt install python3-pip python3-dev python3-setuptools python3-venv git libyaml-dev build-essential ffmpeg- If you are not already logged in as orangeoctopus switch to the new created user
$ sudo -u orangeoctopus bash- Setup folder and install packages
$ cd /home/orangeoctopus
$ mkdir OctoPrint && cd OctoPrint
$ python3 -m venv venv
$ source venv/bin/activate
$ pip install pip --upgrade
$ pip install octoprint- Create auto start function when OrangePi is powered
$ wget https://github.com/OctoPrint/OctoPrint/raw/master/scripts/octoprint.service
$ sudo mv octoprint.service /etc/systemd/system/octoprint.service- Edit octoprint.service
- Make sure that User= contains above used username „orangeoctopus„
- Make sure that the ExecStart= path is correct and contains „orangeoctopus„
$ sudo nano /etc/systemd/system/octoprint.service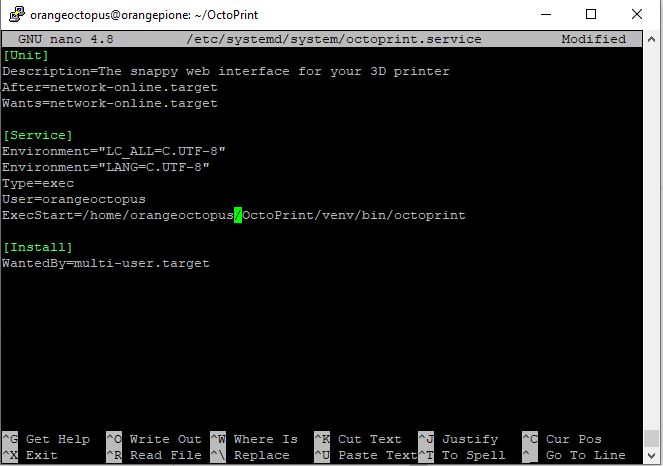
- Exit and save the file
- Activate service with the following commands
$ sudo systemctl enable octoprint
$ sudo systemctl start octoprint- Change Port from 5000 to 80
- For that install haproxy
- And open the config file with nano
$ sudo apt install haproxy
$ sudo nano /etc/haproxy/haproxy.cfg- The haproxy.cfg should contain the following values
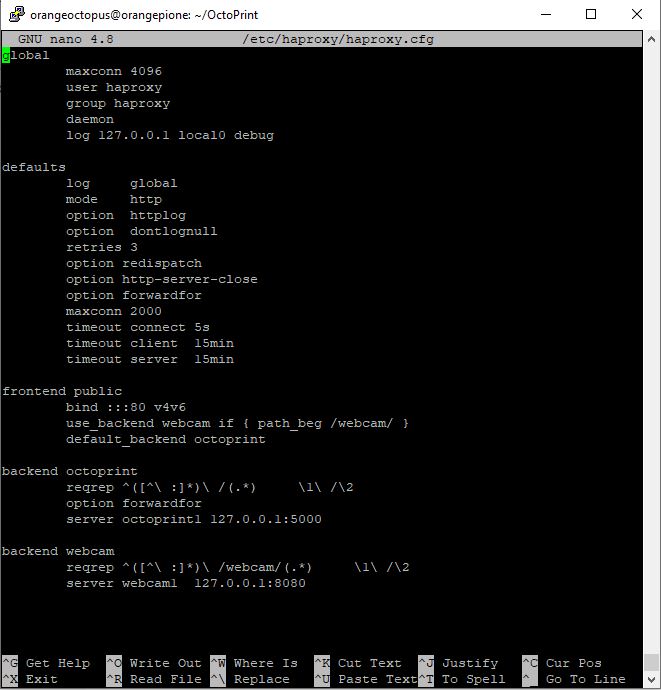
- Exit and safe the config file
- Now enable haproxy by setting ENABLED to 1
$ sudo nano /etc/default/haproxy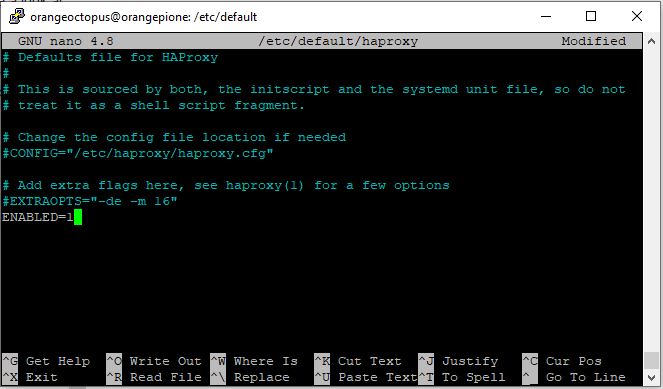
- Exit and save the file
- Start „haproxy„
$ sudo service haproxy start- Two last things needs to be done on the OctoPrint settings
- Bind the server to the loopback interface
- Add or edit the OctoPrint settings to reboot and/or restart the server and board
- For that add the host: 127.0.0.1 to the section server
- And type the system commands for „server: commands: …“ and „server: host: …“
$ sudo nano ~/.octoprint/config.yaml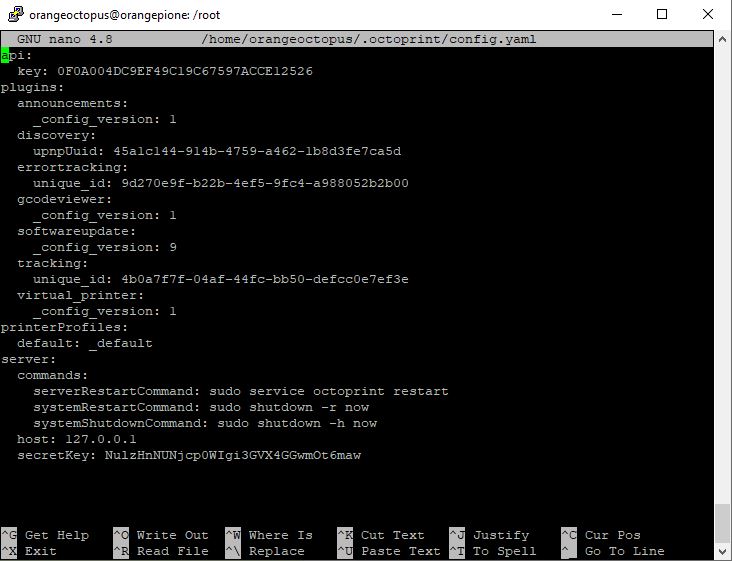
- To get a real „OrangeOctopus“ add to the config.yaml this additional code.
- Place it between api: and plugins:
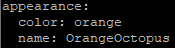
- Exit and save the file
Webcam setup (optional)
- Connect your USB webcam to the OrangePi
- for OrangePi One a usb hub is necessary to connect printer and camera, because the Pi One has only one USB port on board
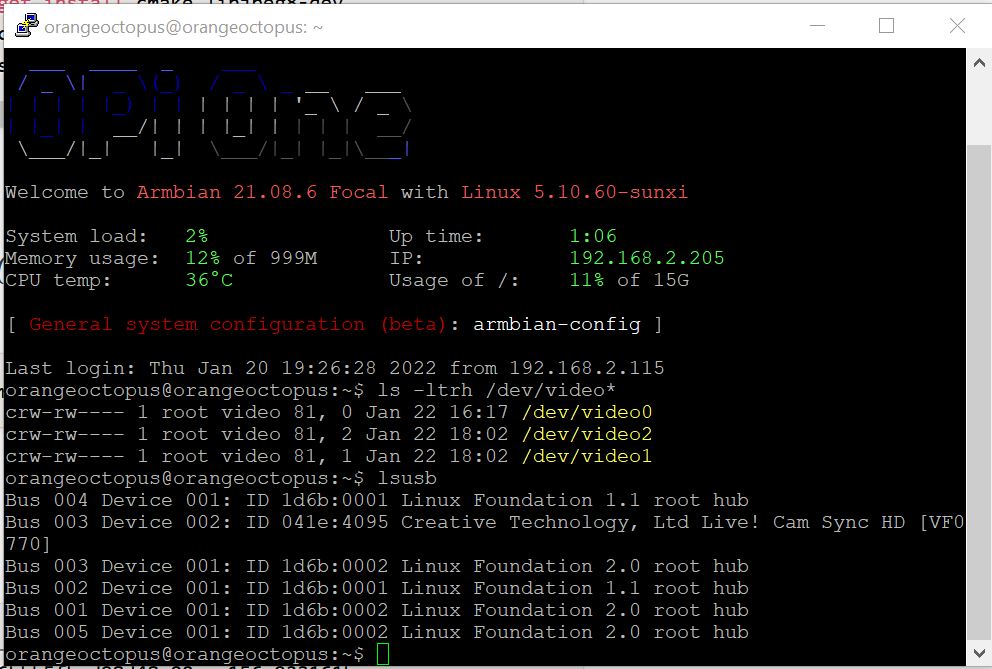
- Verify if the camera is connected and available with this commands:
$ ls -ltrh /dev/video*
$ lsusb- The result for the first command should be minimum one video port
- The list of the second command should contain your camera
- Install „mjpg streamer„
$ sudo apt-get install cmake libjpeg8-dev
$ git clone https://github.com/jacksonliam/mjpg-streamer.git
$ cd mjpg-streamer/mjpg-streamer-experimental
$ make- Test if the streamer is working and the camera is available
- For that start the streamer manually
$ ./mjpg_streamer -i "./input_uvc.so -r 640x480 -f 30 -d /dev/video1" -o "./output_http.so"- And open the browser page at http://[ipaddress]:8080/?action=stream
- if the stream doesn’t appear and your first camera check above shows more that one video port, then try to change /dev/video1 to one of the other available ports
- If your camera stream shows up go ahead with the setup, otherwise troubleshoot your camera connection (find more information in the „sources“ below
- To stop the streamer and go on type CTRL-C
- Create the script folder
- Create the webcam.sh script
- Fill with content like shown
$ mkdir /home/orangeoctopus/scripts
$ cd /home/orangeoctopus/scripts/
$ sudo nano /home/orangeoctopus/scripts/webcam.sh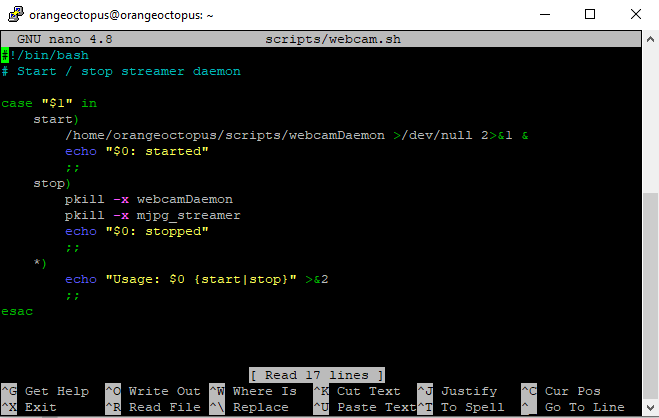
- Create the webcamDeamon script in the same folder
- Fill with content like shown
$ sudo nano /home/orangeoctopus/scripts/webcamDaemon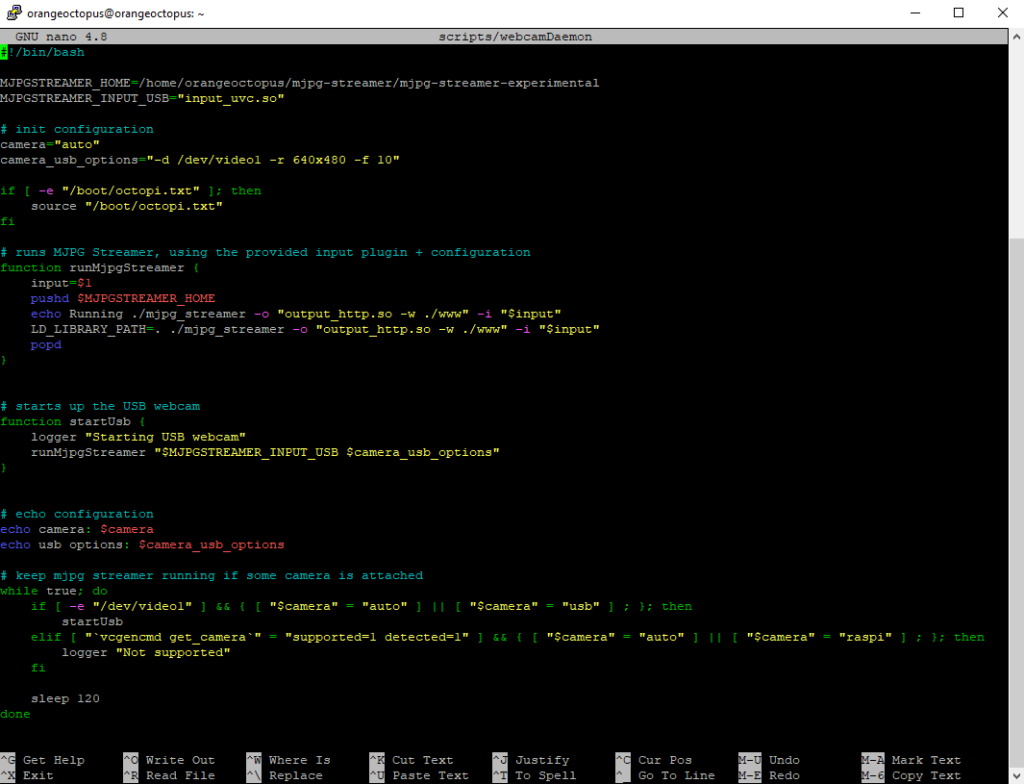
- Grant permissions
$ sudo chmod a+x webcam.sh
$ sudo chmod a+x webcamDaemon- Create service file with the following content
$ sudo nano /etc/systemd/system/webcamd.service
- Reload and enable the service
$ sudo systemctl daemon-reload
$ sudo systemctl enable webcamd- Add the camera setting to the OctoPrint config
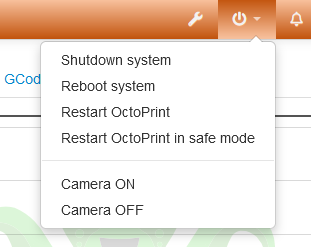
- Adding „system: actions: .. “ enables the functionality to start and stop the webcam on the OctoPrint interface
- Add the system: section after the server: section
- Add the webcam: section after the system: section
$ sudo nano ~/.octoprint/config.yaml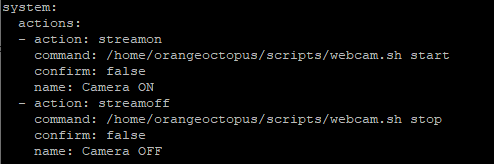

- possible values too:
- snapshot: http://127.0.0.1:8080/?action=snapshot
- stream: /webcam/?action=stream
- The ip address has to be yours! The screenshot shows mine!
- This settings has to follow the correct order shown here.
- The „webcam: …“ setting can be adjusted later in the OctoPrint console
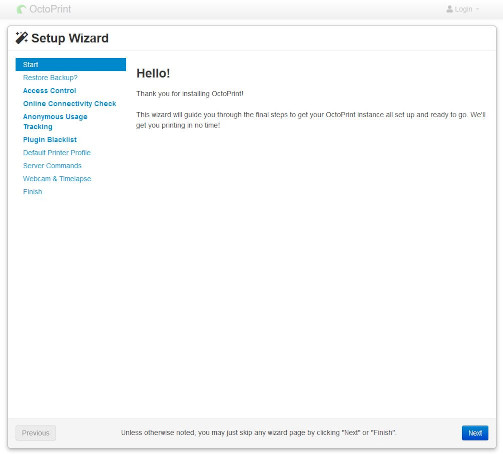
Finalize installation – Open OctoPrint
- Power off the system, wait 30 seconds and bring back the system power.
- Wait another minute to let the system start and establish the server
- Change to your browser and if everything went as expected you should be able to open OctoPrint Setup Wizard on http://[ipaddress] or http://[hostename]
Troubleshooting
- If you face problems with automatic start of OctoPrint you can try to start it manually and you will probably receive error messages that helps you to locate the problem.
$ ~/OctoPrint/venv/bin/octoprint serve
- If you have a damaged YAML there is a backup file in the same folder. Delete the YAML file and replace it by the backup.
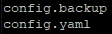
$ cd ~/.octoprint/
$ sudo rm config.yaml
$ cp config.backup config.yaml
Image files
- Download: OrangeOctopus with webcam function
- Use Win32 Disk Imager or balenaEtcher to write on an SD card
- Once you wrote it to a SD card don’t forget to enlarge card space
- Basic Linux setup – User: orangeoctopus Password: OrangeOctopus
- Please change the password
Enlarging card space
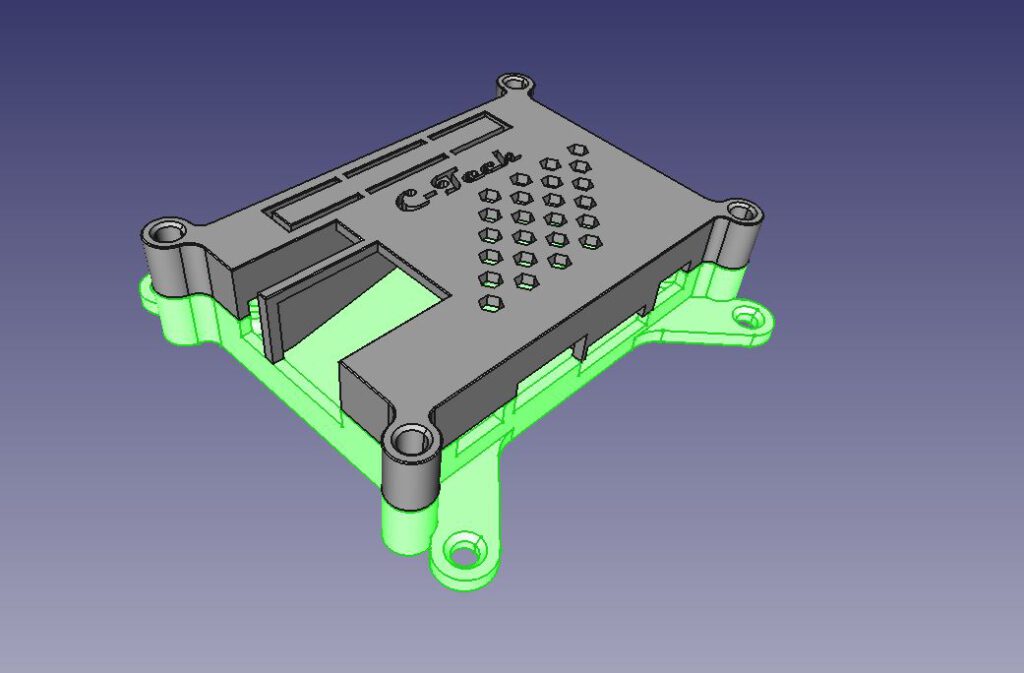
$ sudo systemctl start armbian-resize-filesystemHousing 3D printed
- I adapted a very famous RasperryPi housing for my project. And I published it on Thingiverse
- https://www.thingiverse.com/thing:5224048
- No Printer? No Time? No Problem! – Write a mail to print4me@croonen.org
- Because I am living in Germany I can only ship printed parts within the EU
Sources